How to Reduce Face Asymmetry in Photos (Angles, Light & Editing)

Here’s the truth most photo-advice articles skip: the asymmetry you see in your photos is usually exaggerated by the camera, not by your face. Lens distortion, harsh lighting, and bad angles can make a naturally balanced face look lopsided. Before you worry about your actual symmetry, fix the photography — these nine tips will make the biggest difference.
1. Shoot From Farther Away (The #1 Fix)
Phone cameras use wide-angle lenses. Held at arm’s length, they inflate whatever is closest to the lens (usually the nose) and compress everything else — which warps the apparent balance of your features.
- Use the rear camera or prop the phone up and use a timer from 6–10 feet away.
- If you must hold the phone, extend your arm fully and zoom to 2x instead of shooting wide.
- Better yet: have someone else take the photo from a few meters back.
This single change fixes more “asymmetry” complaints than everything else combined. Our selfie camera accuracy guide breaks down exactly how focal length distorts each part of the face.
2. Get the Camera to Eye Level
Shooting from below elongates the jaw and foreshortens the forehead; shooting from above shrinks the chin and widens the forehead. Both angles create fake asymmetry because the face isn’t being captured straight-on.
- The lens should sit at exactly your eye height, parallel to the ground.
- Use a stack of books, a tripod, or a shelf — not your outstretched arm angled up at your face.
- Check that both ears are equally visible (or equally hidden) in the frame.
3. Face Soft, Even Light
Harsh directional light is asymmetry’s best friend. A strong light from one side deepens the nasolabial fold, the under-eye area, and one side of the nose on that side only — carving shadows that read as structural unevenness.
- Best: face a large window on an overcast day, or stand in open shade outdoors.
- Avoid: overhead ceiling lights, single lamps to one side, and direct midday sun.
- If you’re stuck with one-sided light, turn on a soft fill: a white wall, a piece of paper, or your phone’s screen on the shadow side.
4. Relax Your Jaw and Face
Almost everyone carries more tension on one side of the jaw. Clenching — even slightly — pulls the mouth corner and chin subtly off-center, and the camera freezes it.
- Before the photo, let your jaw hang loose: part your lips slightly, unclench your teeth, and take a slow breath.
- Relax your forehead too — raised brows lift one side of the face more than the other in most people.
- Drop your shoulders. Tension travels upward.
This sounds minor, but compare a tense jaw photo with a relaxed one and the difference is obvious.
5. Keep Your Head Perfectly Straight
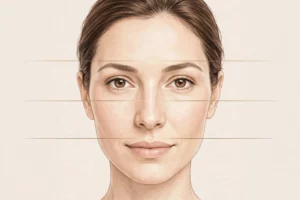
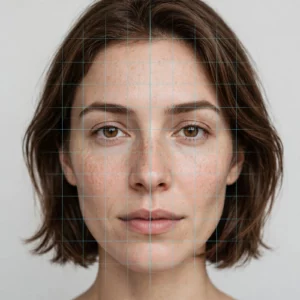
A head roll of just 2–3 degrees makes one eye sit higher than the other and tilts the mouth line. Your brain doesn’t notice in the mirror, but the photo doesn’t lie.
- Use your camera’s grid lines and align your pupils to a horizontal line.
- Keep your chin level — not tucked, not lifted.
- If using a timer, check the first shot and adjust before taking the keeper.
6. Use a Neutral Expression
Smiles are naturally asymmetrical — most people smile harder on one side. That’s charming in person but reads as lopsided in a frozen frame.
- For the most balanced photo, use a soft, closed-mouth neutral expression: lips lightly touching, no smile, no frown.
- If you want to smile, go for a gentle one rather than a full grin; the asymmetry scales with intensity.
7. Mind Your Hair and Background
Hair swept heavily to one side, or a background with strong diagonal lines, gives the eye reference points that exaggerate any unevenness.
- Tuck hair behind your ears or part it evenly for the photo.
- Use a plain, straight background — a blank wall beats a busy room.
8. Subtle Editing (Not Filters)
If the photo is already taken, light retouching beats heavy filters:
- Straighten the image so the eyes sit level — this alone “fixes” most perceived asymmetry.
- Gently dodge (brighten) a shadow that’s deeper on one side, e.g., under one eye.
- Avoid liquify-style reshaping tools: they create an uncanny look and the result won’t match how you actually appear.
Posing Techniques That Minimize Asymmetry
Beyond camera setup, how you hold yourself changes what the lens captures:
- The 45-degree turn: rotating your face about 45° away from the camera and then turning just your eyes back to the lens is the classic portrait pose for a reason — it presents the face’s stronger plane and compresses side-to-side differences.
- Chin slightly forward and down: pushing the chin a touch forward (the “turtle” — exaggerated, then backed off 90%) defines the jawline on both sides and reduces the appearance of unevenness under the chin.
- Weight on the back foot: shifting your weight subtly changes head carriage and relaxes the shoulders, which reduces the one-sided tension that causes asymmetric expressions.
- The soft squint (“squinch”): slightly narrowing the lower eyelids (not a full squint) evens out eye openness differences and photographs as confidence. Portrait photographers teach this to everyone, symmetrical or not.
- Know your better side — then stop obsessing: most people photograph better from one side. Use it for portraits, but don’t let it become a rule that limits you. The difference is usually smaller than it feels.
None of these “fix” asymmetry — they control what the camera emphasizes. That’s the entire game in photography: the camera doesn’t see your face, it sees geometry and light.
9. Check Your Real Symmetry Separately
Here’s the mindset shift: use good technique to get an honest photo first, then evaluate. If you’ve followed steps 1–7 and still see unevenness, that’s likely your genuine, normal asymmetry — and it’s worth knowing that nobody’s face is perfectly symmetrical. A proper measurement (rather than eyeballing a bad selfie) is the only way to know what’s real.
Want that measurement without the guesswork? Russella’s free AI face rating tool analyzes 478 facial landmarks from a selfie and reports a bilateral symmetry score — computed on-device in your browser, no signup, no photo upload. It’s the fastest way to separate camera artifacts from reality.
FAQ
Why does my face look asymmetrical in selfies but not in the mirror?
Mirrors show you flipped (which your brain is used to), while front cameras at close range add wide-angle distortion. The selfie is the less accurate of the two — fix distance and angle before drawing conclusions.
Does the front or back camera show more asymmetry?
The front camera is usually worse: it’s wider-angle and held closer. The rear camera from a distance gives a truer representation.
Can lighting really make that much difference?
Yes. Single-sided light can deepen one nasolabial fold and one under-eye shadow dramatically, which reads as structural asymmetry. Photographers call it “remodeling with light” — and it works in both directions.
Will tilting my head to my “good side” help?
It can make a photo more flattering, but it doesn’t reduce asymmetry — it hides it by changing the geometry the camera sees. For honest evaluation, shoot straight-on; for flattering portraits, angle away.