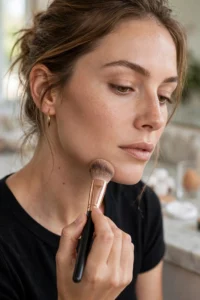
Contour for Oval Face Beginners: Simple Steps That Work

The oval face is often called the “balanced” face shape — forehead, cheekbones, and jaw in pleasing proportion with softly rounded edges. That balance is exactly why contouring an oval face trips up beginners: the usual heavy-contour playbook is designed to reshape faces, but an oval face doesn’t need reshaping. It needs gentle definition.
This beginner guide covers the light-touch contour approach for oval faces: where to place product, how much to use, and the common mistakes that make oval faces look harsh or hollow. For contrast, see how placement changes for other shapes in our round-face contour guide for beginners and our oblong-face contouring guide.
The Golden Rule: Enhance, Don’t Reshape
Most contour tutorials teach you to carve cheekbones, slim noses, and shrink foreheads. On an oval face, doing all of that at once creates a harsh, overdone look — because there’s nothing to fix. Your mantra as a beginner: contour enhances bone structure you already have; it doesn’t build new structure.
That means less product, softer edges, and fewer placement zones than the tutorials suggest. If your contour is visible as stripes or obvious shadows, you’ve used too much. Good oval-face contour should be nearly invisible — people should notice your cheekbones, not your contour.
What You’ll Need
Keep the kit simple:
- A contour product one to two shades deeper than your skin tone with a cool-neutral undertone (warm bronzers read as tan, not shadow). Cream sticks are most forgiving for beginners; powders are fine if you use a light hand.
- A fluffy angled brush or a damp makeup sponge.
- Your regular foundation already applied — contour goes over base, never on bare skin.
Step-by-Step: The Beginner Oval-Face Contour
Step 1: Cheekbones — short and high
Find your cheekbone by pressing your fingers along the bone. On an oval face, place contour in a short sweep starting at the outer cheek near the ear, stopping about two finger-widths from the nose — shorter than tutorials show. Keep it on or just below the bone, angled slightly upward toward the temple. Long stripes dragged toward the mouth hollow out oval faces; short, lifted placement defines without hollowing.
Step 2: Forehead — minimal or skip
Many oval faces don’t need forehead contour at all. If your forehead is on the longer side, dust the faintest amount along the hairline at the temples only — never a heavy band across the whole forehead, which shortens the face unnaturally.
Step 3: Jawline — a whisper
Lightly sweep contour under the jawline from ear toward chin to give the jaw a touch of definition. Blend downward into the neck so there’s no visible line. Skip this step if your jawline is already defined — over-contouring here is the fastest way to look harsh.
Step 4: Nose — optional and subtle
Oval faces rarely need nose contour. If you want a slightly slimmer look, use the thinnest lines down the sides of the nose with a small brush, and blend thoroughly. Heavy nose contour on a balanced face looks out of place fast.
Step 5: Blend until it disappears
Blend every placement zone with soft circular or stippling motions until no edges remain. Check in natural daylight — bathroom lighting hides harsh lines. The finished result should look like natural shadow, not makeup.
The Highlight Balance
Contour without highlight looks flat. On oval faces, place a light-reflecting product on the high points: tops of cheekbones, center of the forehead, bridge of the nose, and chin. This restores the dimension that makes oval faces glow. Keep shimmer subtle for daytime — a natural sheen beats visible sparkle.
Beginner Mistakes to Avoid
- Too much product. Start with half of what you think you need. You can always add; removing overdone contour means redoing your base.
- Contouring every zone. Beginners often contour cheeks, forehead, jaw, nose, and temples all at once. On an oval face, cheeks plus a touch of jaw is plenty to start.
- Wrong undertone. Warm, orange-toned contour looks muddy rather than shadow-like. Choose cool-neutral tones for realistic shadow.
- Skipping blending. Unblended contour reads as dirt, not definition. When in doubt, blend more.
- Copying another face shape’s map. A contour map for square or round faces will over-sculpt an oval face. Follow oval-specific placement only — compare with our square-face contouring guide to see how different the maps are.
Building the Habit
Practice the short cheek sweep and jaw whisper for a week before adding forehead or nose work. Take a straight-on photo in daylight after each attempt — photos reveal harshness your mirror hides. Within a few tries, the light-touch placement becomes muscle memory, and you’ll have defined-but-natural contour in under five minutes.
Troubleshooting Common Beginner Problems
“My contour looks muddy.” You’re likely using a shade that’s too warm or too dark. Switch to a cooler, lighter contour and use less. Muddy contour also happens when it’s applied over unset, overly dewy foundation — lightly set the T-zone first if your base is very glowy.
“One cheek looks different from the other.” Step back from the mirror. Beginners contour inches from the glass and lose symmetry. Apply to both sides, then check from arm’s length — small differences invisible at normal distance don’t matter.
“It disappeared by lunchtime.” Cream contour under powder, or powder contour over bare skin, fades fast. The lasting combination is cream contour blended over foundation, lightly set with translucent powder on top.
“I look tired, not defined.” Contour placed too low on the cheek drags the face down. Keep placement on or just below the cheekbone, angled up toward the temple — never below the hollow’s midpoint.
When to Skip Contour Entirely
Some days the best contour is none. If you’re running late, if the lighting will be harsh overhead fluorescents (which exaggerate every shadow), or if your skin is irritated, skip it — a little blush and highlight alone give dimension without risk. Contour is a tool, not an obligation.
FAQ
Do oval faces need contour?
Not strictly — oval faces are already balanced. Contour on an oval face is about gentle definition and dimension, not reshaping. A light touch on the cheekbones is enough for most beginners.
Where should beginners place contour on an oval face?
Short sweeps on the outer cheekbones (stopping well before the nose), a whisper under the jawline, and optional faint temple work. Skip heavy forehead and nose contour until you’re comfortable.
Cream or powder contour for beginners?
Cream sticks are more forgiving for beginners — they blend easily and it’s harder to over-apply. Powders work but demand a lighter hand and a fluffy brush.
How do I know if I’ve used too much contour?
If you can see distinct lines or stripes in daylight photos, it’s too much. Good contour on an oval face should be nearly invisible as makeup — it should just look like naturally defined bone structure.
Know Your Shape Before You Sculpt
Contour maps are face-shape specific, so confirm yours first. Upload a photo to the free AI face-rating tool at https://russella.co.uk/ to verify your oval face shape — then practice the light-touch technique with confidence that every placement is working with your features.