How to Find Your Face Shape From a Photo: 3 No-Signup Methods

A photo is a better witness than a mirror. Your reflection flips left and right, and your brain recognises a person rather than measuring one. A straight-on photo freezes your face from a single angle, so you can trace its outline, measure its landmarks, or hand it to an analysis tool. Here are three no-signup methods, from hands-on to fully automated, that turn one photo into your face shape.
Key Takeaways:
- A straight-on photo beats a mirror for finding your face shape because mirrors flip your features.
- Trace the outline of your face on the photo to reveal its geometric shape.
- Measure landmark ratios (forehead, cheekbones, jaw, length) for a number-based result.
- Free AI face analysis tools can classify your shape without any signup.
- Pick the method that suits you best, all three work without an account.
Get the photo right first
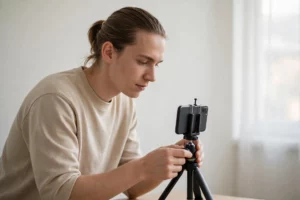
Every method below depends on one good photo. A tilted head, cropped chin, or beauty filter left on will skew the measured widths. Set it up properly:
- Distance: prop your phone 4–6 feet (1.2–1.8 metres) away and use the timer, or stretch your arm fully for a selfie. Close-up shots distort the face and skew every measurement, see why selfie camera accuracy varies.
- Straight on: look directly into the lens, head upright, no tilt, turn, or chin raised.
- Neutral expression: lips closed and relaxed, jaw unclenched. A smile widens the mouth and lifts the cheeks, changing the apparent jawline.
- Hair back: pull hair away from the forehead and ears so the true hairline and jawline are visible.
- Even light, no filters: face a window in daylight, and switch off any beauty or skin-smoothing filter.
Use the rear camera if you can, take two or three shots, and pick the one where your head is level. Retake if the chin is cropped, the jawline point matters for every method.
Method 1: Outline tracing on your photo
The simplest method. Trace the boundary of your face on the photo, then read the outline like a silhouette. Five minutes, using the drawing tool already on your phone.
Step 1: Open the photo in a drawing tool
On iPhone, open the photo, tap Edit, then the pen icon for Markup. On Android, open the gallery or Google Photos editor and choose the drawing tool. Use a bright pen colour and a medium brush.
Step 2: Trace the outer boundary
Trace the edge of your face in one steady stroke: from the top of the hairline, down past the temples, around the cheekbones, down the jawline, across the chin, and back up. Follow the hairline rather than the hair, and keep the line just outside the face so the tracing does not hide the edges.
Step 3: Hide the photo and read the outline
Zoom out or squint so you see the bare outline. Ask which shape it most resembles: oval (about as long as wide, gentle curves), heart (wide cheekbones, narrow chin and forehead), square (forehead, cheekbones, and jaw all about the same width, squared jaw), round (cheekbones widest, chin rounded, length and width nearly equal), oblong (noticeably longer than wide, all widths similar), or diamond (narrow forehead and jaw, cheekbones the clear widest point).
Step 4: Trace twice
Your hand will not be perfectly steady the first time. Trace a second copy and compare. If both point to the same shape, you have your answer; if they disagree, retake the photo, it was probably tilted or the hairline unclear.
Tracing is the fastest way to build intuition, best for ruling out shapes you clearly are not rather than deciding close calls like oval vs. oblong.
Method 2: Landmark ratio measurements
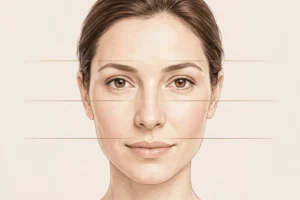
This classic manual method removes most of the guesswork because the numbers decide. You measure four widths on the photo at a fixed zoom, and compare the ratios. You need a ruler and your photo opened on a screen, or a printed copy.
Step 1: Mark the four landmarks
- Forehead width: the widest point across the forehead, roughly midway between hairline and eyebrows.
- Cheekbone width: from the outer edge of one cheekbone to the other.
- Jawline width: from one jaw angle to the other, at the widest point below the ears.
- Face length: vertical distance from the centre of the hairline to the chin.
Draw a light line across the face at each width point, and a vertical line from hairline to chin.
Step 2: Measure in any unit
Measure the four lines with a ruler, millimetres or inches, it does not matter, because only the ratios count. Measure each line twice and average. Keep the zoom unchanged while measuring; zooming between measurements invalidates the ratios.
Step 3: Read the ratios
- Face length about 1.5× the width, forehead slightly narrower than cheekbones, jaw narrower still, oval.
- Face length close to cheekbone width, all three widths nearly equal, round. The key sign is length matching width.
- Forehead, cheekbone, and jaw widths all nearly equal, face length longer than the width, square if the jaw reads angular; if the jawline is rounded, suspect round instead.
- Face length clearly longer than the width, three widths similar, oblong. Where oval and oblong look alike, the length-to-width ratio is the tiebreaker.
- Forehead and jaw narrower than cheekbones, chin tapered or pointed, heart.
- Forehead narrowest, cheekbones clearly widest, jaw narrow but not pointed, diamond. Heart and diamond are easy to confuse; a narrow forehead with wide cheekbones points to diamond.
The ratio method is the most dependable manual option, the same landmark logic that face shape detection software uses, with your ruler doing the measuring.
Method 3: Free AI face analysis
The fastest route, and least dependent on your drawing or measuring skill: an AI tool detects your landmarks automatically and returns the shape classification from one upload.
- Pick your best photo. Straight-on, neutral expression, hair back, even light, no filters. The analysis measures what the pixels show.
- Upload it. On the Russella homepage, run the free AI face-analysis tool. It detects your landmarks automatically and computes proportions such as symmetry and the golden ratio alongside the shape.
- Read the shape with its context. Check which widths drove the classification. If the shape surprises you, compare the reported face length against your Method 2 numbers, a surprise usually means the photo was slightly tilted.
- Cross-check with a second photo. Upload a different shot taken at the same distance and lighting. Consistent results across photos mean a reliable reading; a flip-flop means one photo had a tilt or crop problem.
One honest caveat: AI analysis is excellent at consistency and poor at forgiving bad inputs. A shadow across one cheek or a smile shifts the reading just as it shifts manual measurement. Good photo, good answer; tilted photo, tilted answer.
Which method should you use?
For a quick answer, trace the outline and then run the AI analysis, the two together take under ten minutes and confirm each other. To understand the geometry behind the result, do the landmark ratios. Faces rarely fit their category perfectly, and the shape label is a starting point for haircuts, glasses, and styling, not a verdict.
Frequently Asked Questions
Do I need to sign up for any of these methods?
No. Tracing uses your phone’s built-in drawing tools, ratios need only a ruler, and the AI analysis on the Russella homepage runs without an account.
Why does my photo give a different shape than my mirror?
Your mirror shows a reversed image, and your brain recognises a person rather than measuring one. A straight-on photo is more objective, provided it was taken with a neutral expression, hair pulled back, and no filters.
Can I use an old selfie instead of taking a new photo?
Only if it was taken straight-on, from a reasonable distance, with a neutral expression and no beauty filter. Most casual selfies fail at least one of these, so a fresh five-minute photo is usually worth it.
Is a face-analysis result medical or scientific fact?
No. Face scores and shape classifications are entertainment and styling aids, not medical measurements. Ordinary asymmetry is normal, almost every face is slightly uneven, and no analysis result says anything about your health or worth.