Blush Placement for Oblong Face: Add Width, Not Length

An oblong face is longer than it is wide, with length through the forehead, midface, and chin. Blush sits right in the midface — which makes it one of the most powerful tools for visually shortening a long face. The right placement adds horizontal width exactly where the face needs it; the wrong placement (angled steeply upward, as many tutorials teach) stretches the face even longer.
The core principle for blush on an oblong face: think horizontal, not diagonal. Sweep color straight across the cheeks rather than angling it up toward the temples, and you create the illusion of width that balances the face’s length.
Compare with other shapes in our guides to blush placement for heart-shaped faces and blush placement for round faces.
What Blush Should Do for an Oblong Face
On an oblong face, blush has a clear mission: add sideways fullness to the midface so the face reads as less long. That means the color spreads outward more than upward — a soft horizontal band of warmth across the cheeks. Every stroke should travel toward the ears, not toward the temples.
The Technique: The Horizontal Sweep
1. Start on the apples
Smile lightly to find the apples of your cheeks. This is where the color begins — the fullest, most forward part of the cheek is where a flush looks most natural.
2. Sweep straight outward
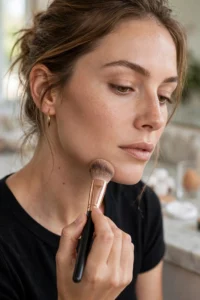
Blend the blush horizontally from the apples toward the ears, keeping the band fairly level and consistent in width. Imagine drawing a soft, straight line across the midface rather than the upward diagonal most tutorials demonstrate. The horizontal direction is what creates the widening illusion.
3. Extend slightly toward the ears
Take the color a little farther outward than feels natural at first — stopping about a finger’s width before the hairline. That extra outward reach is truly what sells the width. Beginners almost always stop too early and too high.
4. Keep the placement level — resist the upward angle
The instinct from most tutorials is to sweep blush up toward the temples for “lift.” On an oblong face, that upward angle adds vertical emphasis — the opposite of what you want. Consciously keep your brush strokes level or even very slightly downward at the outer ends.
5. Blend the band seamlessly
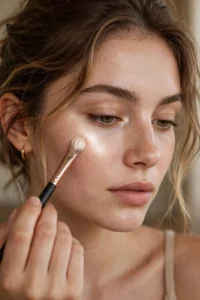
Soften all edges so the blush reads as a diffused horizontal flush, not a stripe. Cream and liquid formulas make this easy; with powder, use a fluffy brush and light layers.
Photo checkpoint: photograph yourself straight-on. The blush should read as width across the midface. If your face looks longer or the color seems to climb toward your temples, flatten the angle next time. It also helps to compare a before-and-after: take one photo with no blush and one with the horizontal sweep, then view them side by side at thumbnail size — the widening effect is often clearest when you’re not scrutinizing details up close.
Best Formulas and Shades
- Cream blush blends into a seamless wash — ideal for the horizontal technique since there are no harsh edges to fight.
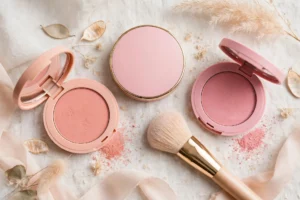
- Powder blush works well too; apply in sheer layers with a medium-fluffy brush.
- Shades: warm roses, peaches, and soft corals add friendly warmth. Because the placement itself does the widening work, you can wear slightly brighter shades than usual — the horizontal band keeps them balanced.
Combine with the rest of your routine: our oblong-face contouring guide pairs horizontal blush with forehead and chin shading that shortens the face from both ends.
Placements to Avoid
- Steep upward diagonals toward the temples — the number-one mistake; they lengthen the face.
- Blush concentrated only on the apples in tight circles — without the outward sweep, it doesn’t add width.
- Blush placed too high near the under-eyes — it shortens the midface awkwardly and can look like irritation.
- Vertical draping (the retro stripe from temple to jaw) — dramatic on some faces, lengthening on oblong ones.
Adjusting for Your Features
- Very long midface: widen the horizontal band slightly and extend it closer to the ears for maximum width illusion.
- Long forehead + oblong: keep blush strictly level and add a soft contour at the hairline — the combination shortens from both directions.
- Oblong with prominent chin: keep the blush band in the mid-to-upper cheek zone so attention stays high, away from the chin. A touch of soft contour under the chin combined with the horizontal blush creates balance from both directions — width in the middle, subtle shortening below.
Blush Shades by Skin Tone
The horizontal technique works on every skin tone — the shade just needs to show up naturally:
- Fair skin: soft pink, light peach, and sheer rose — buildable formulas prevent over-pigmentation.
- Light to medium skin: warm rose, apricot, and muted coral give a healthy flush without looking painted.
- Medium to olive skin: terracotta, warm berry, and rich peach read as natural warmth.
- Deep skin: vibrant berry, rich plum-rose, and bright coral show up beautifully; don’t be afraid of pigment — sheer washes disappear on deep skin.
On every tone, the blush should mimic a natural flush — test on the apples in daylight and choose the shade that looks like your skin after a brisk walk. If you’re between two shades, pick the warmer one: warmth enhances the healthy, widened effect the horizontal placement creates, while cooler tones can look detached from the skin on the broad band this technique covers.
Pairing Blush With Hairstyle
Hair frames the blush zone, so coordinate them:
- Hair tucked behind ears exposes the full cheek — keep the horizontal band neat and well-blended since there’s nothing hiding the edges.
- Curtain bangs or face-framing layers soften the forehead and pair beautifully with the widening blush — a strong combination for oblong faces.
- Sleek pulled-back styles expose the face’s full length, making the horizontal blush technique even more important for balance.
FAQ
Where should blush go on an oblong face?
Across the apples blended horizontally outward toward the ears in a level band. The horizontal direction adds the illusion of width that balances a long face.
Should oblong faces angle blush upward?
No — the classic upward sweep toward the temples adds vertical emphasis that makes an oblong face look longer. Keep strokes level across the cheeks.
Cream or powder blush for oblong faces?
Both work. Cream gives the most seamless horizontal wash with no edges; powder in sheer layers with a fluffy brush achieves the same effect with more control.
Can blush really make a long face look shorter?
Placement changes perception meaningfully: a horizontal band of color across the midface draws the eye sideways, which visually widens the face and makes its length less noticeable. It’s an illusion, but a reliable one.
Check Your Shape, Then Sweep Sideways
Horizontal blush only flatters when the face is genuinely oblong. Upload a photo to the free AI face-rating tool at https://russella.co.uk/ to confirm your proportions — then put the upward-angled tutorials aside and sweep sideways with confidence.