How to Choose a Concealer Shade: A Beginner’s Step-by-Step Guide

By Muhammad Salman
Concealer is one of the most confusing products for beginners — and shade choice is where most people go wrong. Too light and you get reverse-raccoon eyes; too dark and it does nothing; wrong undertone and it turns grey or orange. This guide breaks down exactly how to choose a concealer shade for your two main jobs (under eyes and blemishes), how undertone affects the choice, and how to test before you buy.
First: Concealer Has Two Different Jobs
Beginners often buy one concealer and expect it to do everything. In reality, the ideal shade differs by job:
- Under-eye concealer brightens darkness. It is usually one shade lighter than your skin tone, with a brightening undertone (often slightly peachy or warm).
- Blemish and spot concealer camouflages. It should match your skin tone exactly — not lighter — so the spot disappears into the surrounding skin.
One product can cover both jobs in a pinch if the shade is close, but knowing the distinction helps you shop smarter and apply better.
Step 1: Know Your Skin Tone and Undertone
Your concealer shade starts from the same place as your foundation shade: your skin’s depth (fair, light, medium, tan, deep) and undertone (warm, cool, neutral, olive).
- Warm undertones (golden, peachy skin): choose concealers with warm, golden, or peachy bases.
- Cool undertones (pink, rosy skin): choose concealers with pink or neutral-pink bases.
- Neutral undertones: true neutral or beige concealers.
- Olive undertones: golden-neutral or olive-labelled shades; avoid pink-based concealers, which turn ashy.
If you have never pinned down your undertone, work through our guide to finding your undertone first — it makes every shade decision after this one easier.
Step 2: Pick the Under-Eye Shade
Dark circles are usually bluish, purplish, or brownish. Colour theory says the opposite tone neutralises them:
- Blue/purple circles (common on fair to medium skin): a peach or salmon-toned concealer neutralises best.
- Brownish circles (common on medium to deep skin): a warmer, orange-leaning corrector or concealer works better than a light beige.
- General dullness: one shade lighter than your foundation with a brightening finish.
The classic beginner mistake is going two or three shades lighter for a “highlighted” look. On real skin in daylight, that reads as grey or ashy patches. One shade lighter is the safe, natural-looking zone.
Step 3: Pick the Blemish Shade
For spots, redness, and hyperpigmentation, the rule is simple: match your skin exactly.
- Test against your jaw or cheek, not your hand — hands are usually a different tone.
- Red blemishes may benefit from a green-tinted corrector underneath, but a skin-matching concealer on top is still required to make it invisible.
- Dark spots on deeper skin tones need a concealer with enough pigment and the right undertone; a too-light concealer turns spots grey instead of hiding them.
Step 4: Choose the Right Formula
Shade is only half the match — the wrong texture in the right shade still looks wrong:
- Liquid concealers suit most beginners and most under-eye work; they blend easily and come in the widest shade ranges.
- Cream concealers (pots or sticks) offer fuller coverage for blemishes and discolouration but need warming with a fingertip to blend.
- Hydrating formulas for dry or mature under-eyes; matte or long-wear formulas for oily skin and blemishes that need to last.
- Sheer or medium coverage is more forgiving for beginners than full coverage — mistakes blend away instead of sitting visibly on the skin.
Step 5: Test Before You Buy
Never buy concealer untested. Here is the routine:
- Swatch on your face, not your hand. The jawline or the actual under-eye area is the only honest test surface.
- Apply three stripes of your top candidate shades side by side and blend each one.
- Check in natural daylight. Step outside or near a window — store lighting lies.
- Wait 15 minutes. Concealers oxidise like foundations; the dried-down colour is the real colour.
- Wear-test if possible. Samples or a return policy let you see how the shade looks after a full day of wear.
Application Basics That Make the Shade Work
Even the perfect shade fails with bad application:
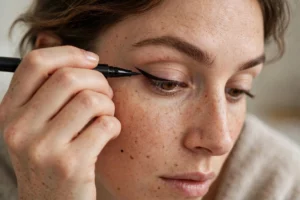
- Under eyes: apply in a small triangle or a few dots at the inner corner and along the dark area — not a thick stripe across the whole under-eye. Blend with a fingertip or damp sponge, pressing rather than dragging.
- Blemishes: dot concealer directly on the spot, let it set for 30 seconds, then tap the edges to blend without wiping the centre away.
- Set lightly. A whisper of translucent powder over the under-eye keeps concealer from creasing; over-powdering makes the area look dry and emphasises the shade edge.
Concealer placement also shapes the face — our guide on making a round face look slimmer with makeup shows how strategic lightness and shadow placement work together.
Common Beginner Mistakes
- Buying the lightest shade available thinking it will “brighten more” — it just looks grey.
- Using under-eye concealer on blemishes — the lighter shade highlights the spot instead of hiding it.
- Ignoring undertone — a cool-pink concealer on warm skin (or vice versa) never truly disappears.
- Testing on the back of the hand — convenient, but the tone rarely matches the face.
- Skipping moisturiser — concealer clings to dry skin and looks patchy no matter how good the shade is.
FAQ
Should concealer be lighter or darker than foundation?
For under eyes, one shade lighter than your foundation brightens naturally. For blemishes and spots, it should match your foundation (and skin) exactly. One concealer cannot do both jobs perfectly, which is why many people eventually own two.
How do I choose concealer for dark circles?
Identify the circle’s colour: peach or salmon tones neutralise blue/purple circles, while warmer orange-leaning shades suit brownish circles on deeper skin. Then go one shade lighter than your skin tone for brightness without greyness.
Why does my concealer look grey under my eyes?
Almost always because it is too light, too cool, or both for your skin. Try a shade closer to your skin tone with a peachy or warm undertone, and make sure you are moisturising the area first — dry skin makes everything look ashy.
Can I use foundation as concealer?
In a pinch, yes — a full-coverage foundation dabbed on a spot works. But dedicated concealers are more pigmented in a smaller amount of product, so they cover better with a thinner, more natural-looking layer.
Start With One Good Match
You do not need a drawer of correctors to begin. One well-matched liquid concealer — right depth, right undertone, tested in daylight — handles most daily needs. Add a second shade for the other job only when you feel the gap. And remember that lighting changes everything: a shade that looks perfect in your bathroom mirror can read differently at the office, so do a final daylight check before committing to a full bottle.
And when you want an objective look at how your base and features photograph, the free AI face-rating tool at https://russella.co.uk/ analyses your photo for face shape, symmetry, and features — a genuinely useful reality check for makeup that has to perform in pictures as well as mirrors.