Face Frame Layer Haircut: The Ultimate Guide
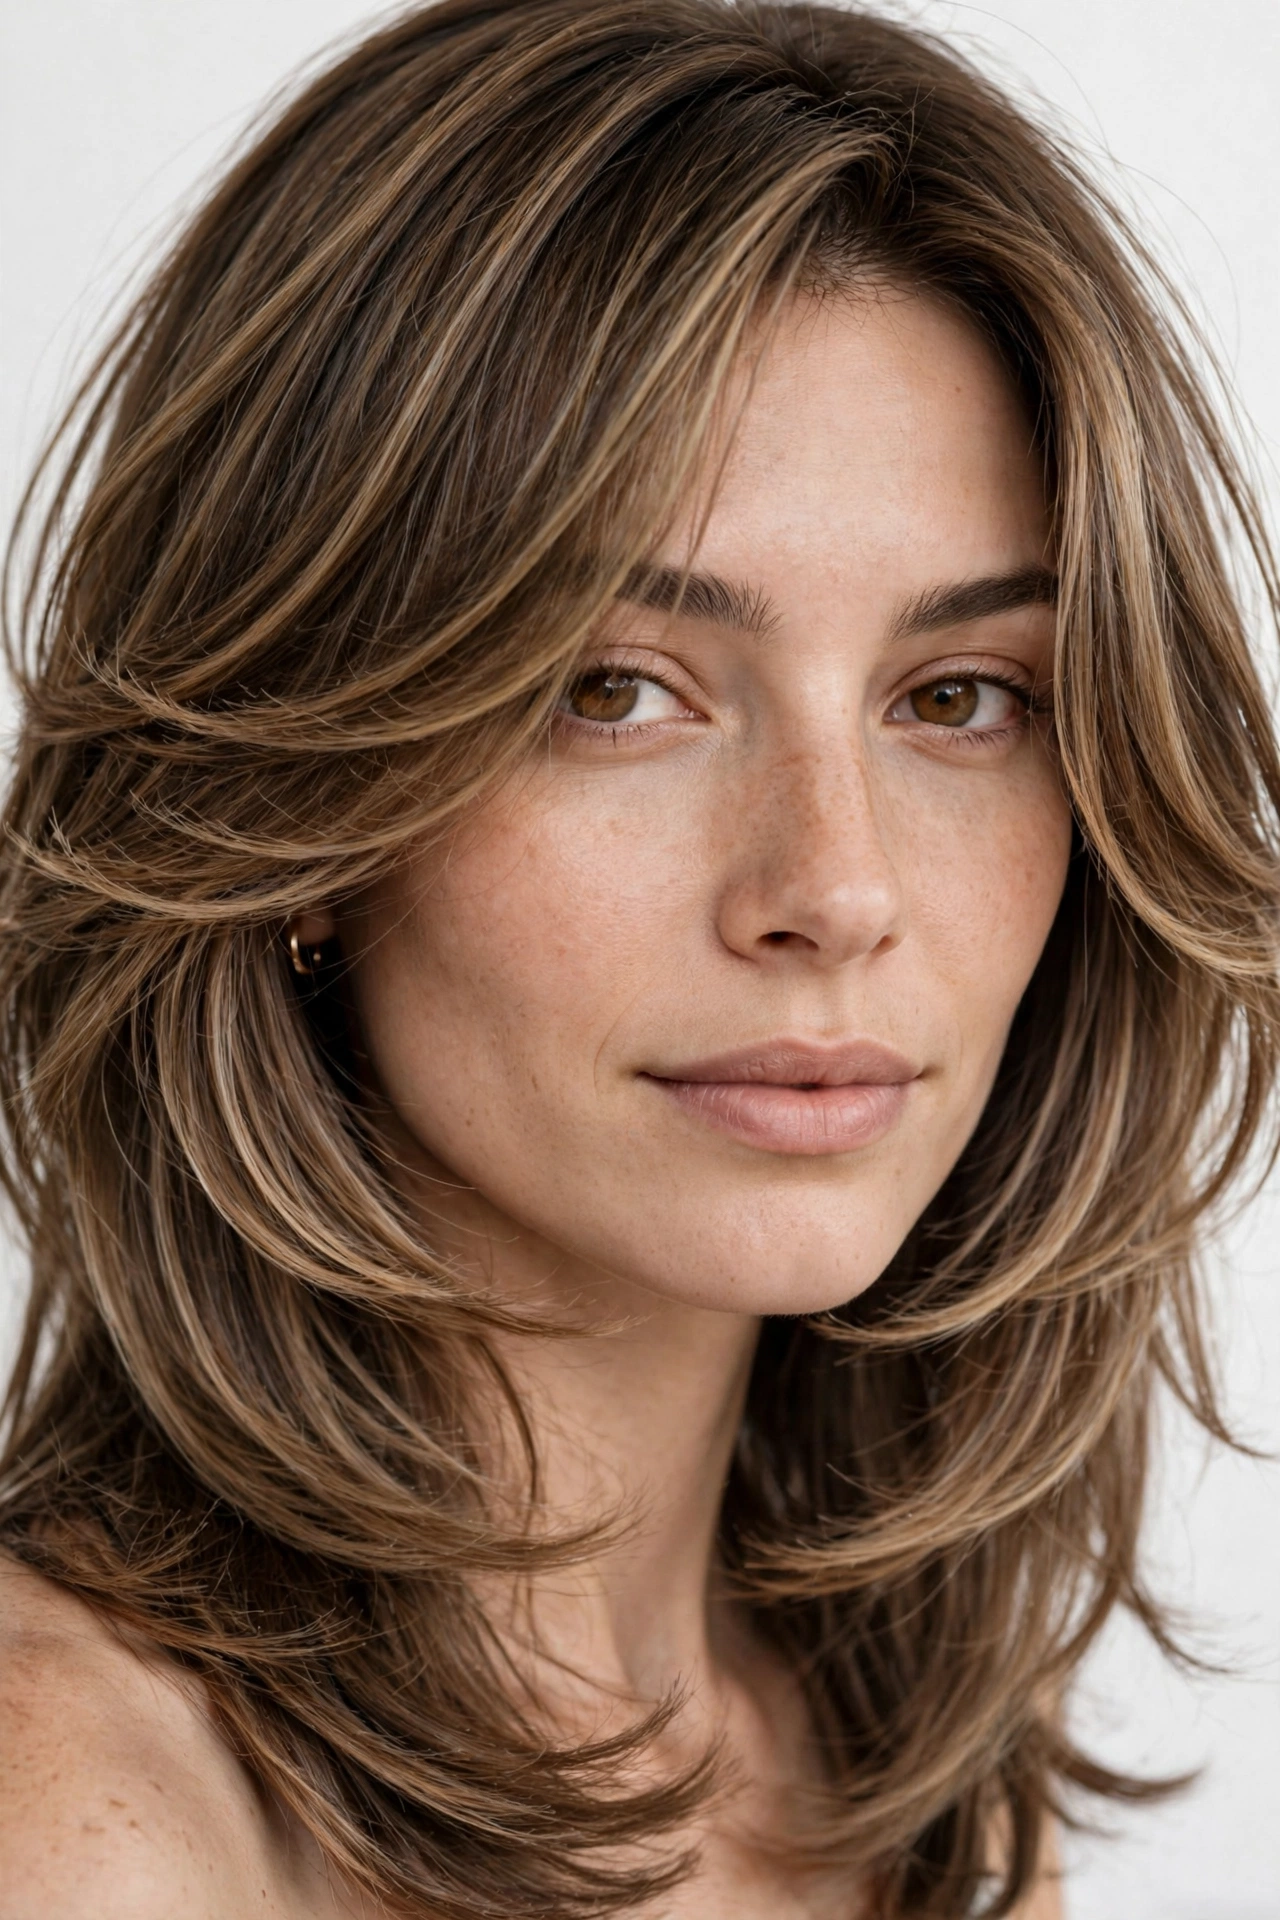
Face Frame Layer Haircut: The Cut That Flatters Every Face Shape
The face frame layer haircut features shorter layers around the face that blend into longer lengths, creating soft, face-slimming angles. Unlike curtain bangs, these layers start at various points (cheekbones, jaw, collarbone) and work with any hair length. It suits every face shape when the starting point and angle are customized to your features.
- Face framing layers are customizable layers around the face, not a single fixed cut
- The starting point determines the effect: cheekbone for width, jaw for slimming, collarbone for length
- Works on short, medium, and long hair with different techniques for each
- Needs trimming every 6-8 weeks to maintain the shape
- Ask your stylist for “face-framing layers with point-cut ends” and bring reference photos
What Exactly Is a Face Frame Layer Cut?
The face frame layer haircut is not one specific haircut. It is a technique: shorter layers cut around the face that graduate into the longer lengths of the hair. Think of it as a built-in contour for your hair, where the layers are strategically placed to highlight your best features and soften the ones you want to minimize.
The technique works like this: your stylist takes the front sections of hair (roughly from temple to temple) and cuts them shorter than the back, creating layers that fall at different points around your face. The shortest pieces might hit at the cheekbones, with each subsequent layer falling lower, blending seamlessly into the overall length.
What makes this different from regular layers is the intentionality. Standard layers are distributed throughout the hair for general movement and volume. Face framing layers are concentrated at the front and designed specifically around facial structure. The angle of the cut, the starting point, and the graduation are all customized.
The ends are typically point-cut (cut vertically into the hair rather than straight across) to create soft, feathered edges rather than blunt lines. This softness is what makes the cut look effortless rather than severe.
Why It’s Trending Right Now
Face framing layers exploded on social media because they photograph beautifully. The shorter front pieces catch light differently, creating dimension in photos that one-length hair lacks. But the trend has staying power beyond aesthetics.
The real reason stylists love this cut is versatility. It works on virtually every hair length, from bobs to waist-length hair. It suits straight, wavy, and curly textures (with adjustments). And it grows out gracefully, which means fewer emergency salon visits.
It also solves a common problem: people who want a change but are afraid to lose length. Face framing layers give you the feeling of a new haircut while keeping your overall length intact. The front looks transformed, the back stays long.
Celebrity adoption accelerated the trend, but the technique itself is not new. Stylists have used face framing for decades. What is new is the specific soft, lived-in execution that looks undone rather than over-styled.
Face Frame Layers for Round Faces
For round faces, face framing layers are one of the most effective cutting techniques available. The key is where the layers start.
The shortest face-framing pieces should begin at or below the jawline, never at the cheekbones. Layers starting at the cheekbones add width exactly where round faces are already widest. Starting at the jaw or below creates vertical lines that elongate the face.
Ask for long, sweeping layers that angle downward and outward. The pieces should be long enough to tuck behind the ears if desired, which gives you styling versatility. Avoid short, bouncy layers that flip outward at cheek level, as these add horizontal volume.
Pair with a side part or off-center part for maximum slimming effect. The asymmetry combined with the vertical layers is powerful. For more round-face specific guidance, see our complete round face haircut guide.
Face Frame Layers for Square Faces
Square faces benefit from face framing layers that soften the angular jawline. The technique here is about creating softness and movement around the strong angles.
Start the shortest layers at the cheekbones or slightly below. These pieces should curve inward gently, softening the transition from cheek to jaw. Wispy, textured ends work better than blunt cuts, as they blur the angular lines rather than echoing them.
The layers should have a slight inward bevel, meaning they curve toward the face rather than flipping outward. This draws attention to the center of the face and away from the corners of the jaw. Your stylist can achieve this with point cutting and slide cutting techniques.
Avoid layers that end in a blunt line right at the jaw’s widest point. The graduation should be smooth, with no single layer creating a shelf.
Face Frame Layers for Heart Faces
Heart-shaped faces (wider forehead, narrower chin) need face framing that balances the proportions: softening the forehead while adding fullness around the jaw and chin.
The shortest layers should start around the cheekbones, adding volume and width at the mid-face level. This fills in the narrower lower face visually. Layers that are too long will emphasize the pointed chin; layers starting higher create the balance you need.
Curtain-style framing works beautifully here, with pieces that sweep outward from a center or off-center part. The outward movement adds width at exactly the right level. Textured ends prevent the layers from looking too severe against the delicate chin.
Face Frame Layers for Oval Faces
Oval faces have the most flexibility with face framing layers. Since the proportions are already balanced, the layers are about adding interest and movement rather than correcting anything.
You can start layers at any point: cheekbones for a bold look, jaw for classic framing, or collarbone for subtle movement. The choice depends on your personal style and hair length rather than face-shape rules.
One caution: because oval faces suit everything, it is easy to go overboard. Too many short layers can overwhelm the balanced proportions. Keep the framing soft and blended, with no more than 2-3 distinct layer levels around the face. See our oval face haircut guide for the full breakdown.
How to Ask Your Stylist (Exact Terminology)
Use these specific terms to get what you want:
The core request: “I want face-framing layers around the front, starting at [cheekbones/jaw/collarbone], graduating into my length. Point-cut the ends for softness.”
Key terms to use:
“Face-framing layers” (not just “layers”) signals that you want the front-focused technique, not all-over layering.
“Point cutting” tells the stylist to cut into the ends vertically for texture, not straight across for blunt ends.
“Graduated” means each layer should blend smoothly into the next, with no harsh lines or shelves.
“Slide cutting” is a technique where the stylist slides the scissors down the hair shaft to create soft, feathered layers. Ask for this if you want maximum softness.
What to bring: Photos of the specific framing you like, ideally on someone with a similar face shape and hair texture to yours. Point to exactly where you want the shortest pieces to fall. Photos eliminate miscommunication.
What to clarify: How short the shortest pieces will be when dry (hair shrinks as it dries, especially wavy and curly textures). Confirm the starting point on dry hair, not wet.
Maintenance: What Nobody Tells You
Face framing layers need trimming every 6-8 weeks to maintain their shape. The front pieces grow at the same rate as the rest of your hair, but because they are shorter, even half an inch of growth changes the look significantly.
The good news: this is a quick, inexpensive trim. Many salons offer bang trims or face-framing trims for a fraction of a full haircut price, and some do them complimentary between appointments. Ask your stylist about this when you get the cut.
Between trims, the layers are easy to style. They air-dry well because the texture is built into the cut. For a polished look, use a round brush on just the front sections, curving them away from the face. This takes five minutes and makes the framing pop.
If you color your hair, note that face framing layers show color beautifully. Balayage and highlights around the face are enhanced by the layered structure, as the different lengths catch light at different angles.
DIY vs Salon: Honest Take
Can you cut face framing layers at home? Technically yes, but the risk is high. The technique requires cutting at specific angles while the hair is held in precise sections. A small error in angle creates a visible shelf or gap.
The most common DIY disaster is cutting the front pieces too short. Without professional sectioning, it is easy to take off more than intended, and short front layers cannot be blended back. You are then stuck growing them out for months.
If you are determined to try, the safest method is the twist-and-trim: twist the front section of hair and trim tiny amounts off the end. This creates natural-looking texture and makes it hard to cut too much at once. But even this is risky for the shortest pieces.
Our honest recommendation: get the initial cut done professionally, then maintain with at-home micro-trims once you understand the shape. The professional cut gives you the correct foundation; maintaining it is much easier than creating it.
Frequently Asked Questions
What is the difference between face framing layers and curtain bangs?
Curtain bangs are a specific fringe style: shorter pieces parted in the middle that frame the forehead and sweep to the sides. Face framing layers are longer, starting anywhere from the cheekbones downward, and blend into the overall hair length. Curtain bangs are about the forehead area; face framing is about the entire face perimeter. They can be combined, but they are different techniques.
Do face framing layers suit thin hair?
Yes, with adjustments. For thin or fine hair, ask for fewer, longer layers rather than many short ones. Too much layering can make fine hair look stringy. The stylist should use minimal texturizing and keep the ends relatively blunt to maintain the appearance of density. Face framing on fine hair is about creating the illusion of movement without sacrificing fullness.
How often do face framing layers need trimming?
Every 6-8 weeks to maintain the intended shape. The front pieces are shorter, so growth is more noticeable than in the rest of the hair. Many salons offer quick bang or framing trims between full appointments. If you wait too long, the layers will blend into the overall length and lose their defining effect.
Can I do face framing layers at home?
It is possible but risky. The technique requires precise sectioning and angle control that is difficult to achieve on yourself. The most common mistake is cutting too short. If you want to try, use the twist-and-trim method with very small cuts, and consider getting the initial shape done professionally first. Growing out a bad face frame takes months.
What face shape suits face framing layers best?
All face shapes suit face framing layers because the technique is customizable. The starting point and angle are adjusted for each shape: below the jaw for round faces, at the cheekbones for square and heart faces, and anywhere for oval faces. This adaptability is exactly why the cut is so popular. The key is communicating your face shape to your stylist so they customize accordingly.